Above:
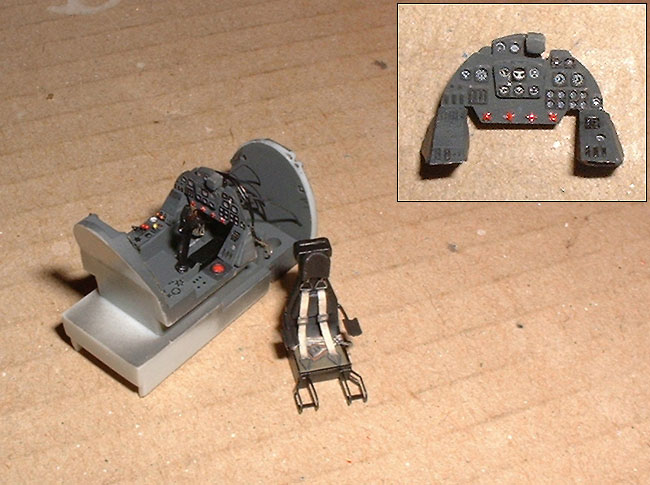
The Eduard etched set really spruces up the cockpit. I
used a Gunze Sangyo black "Gundam Marker" to
pick out the instrument bezels and other details which
worked a treat; far easier and neater than trying to paint
them. I have no idea what the whole Gundam thing is all
about, I've only seen enough to know it interests me about
as much as knitting or taxidermy does. Not at all in other
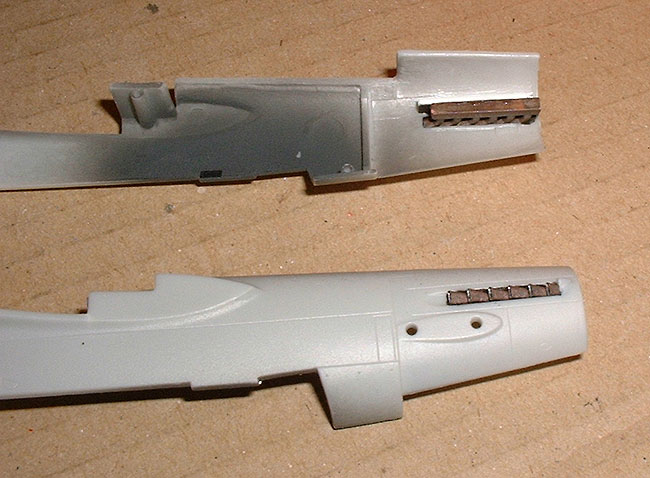
words, but at least the fine point marker is useful. Below: The
hollow metal Moskit exhausts are absolutely superb, what
a shame they've all but become extinct on this planet.
They don't even require painting as they have a nice burnt
metal finish to them straight out of the packet.
Below:
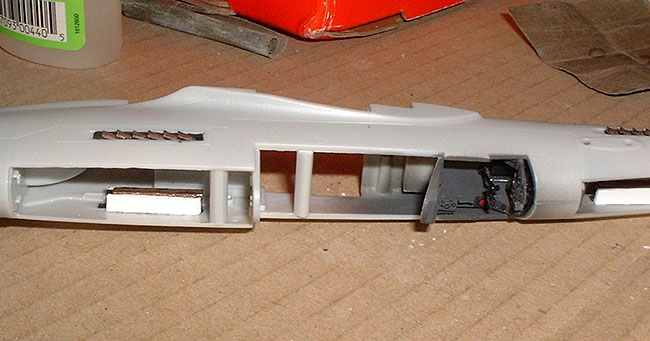
This is where the test fitting and pre-planning come in.
Because Dragon tried to get as many different versions
as possible out of the same basic kit, the additional
parts don't always fit so well, or at all. Left to their
own devices, the poor fitting upper fuselage parts would
overhang the sides and create a very ugly step that would
take an even uglier amount of filler to put right. By
test fitting the parts and adding internal spreader bars
which have been carefully cut to the correct size, little
or no filler should be required on these joins.
Below
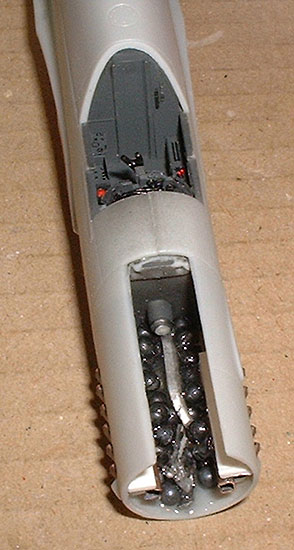
left: I thought I had added more than
enough nose weight, and there was, until I got right near
the end of the build. As soon as that rear prop went on
the Do 335 promptly sat on its tail and refused to get
back up. Oh dear. Fortunately, the front prop was a fairly
tight fit so I didn't bother to glue it on. Even more
fortunate, some years ago I had picked up a pack of fishing
weights of various sizes and the smallest of these - about
1.5mm in diameter - just fit through the hole for the
prop shaft. Using fine point tweezers, each tiny weight
was dipped in epoxy and fed through the hole until I finally
got the Dornier up off its ass. I lost track of just how
many it took after I'd shoved 20 of the little lead bastards
in there.
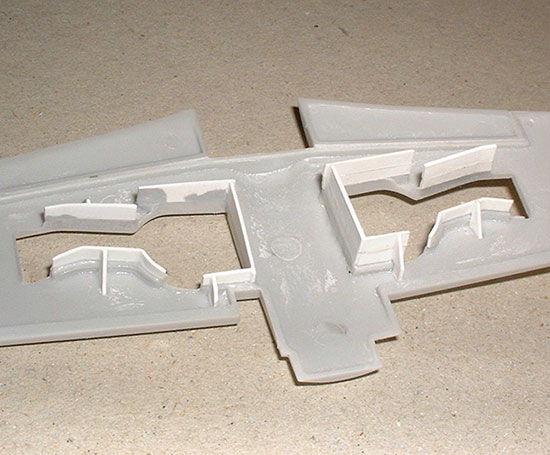
Above:
Dragon only give you half a wheel well so
the sidewalls need extending to fill the gaps. I
used .030" sheet for this, blending them in
with Mr. Surfacer and then sanding them until the
upper wing half fits on. This takes a lot of test
fitting to ensure the new sidewalls fit snugly against
the inside of the top wing half without interfering
with the fit of the lower wing half. The well on
the left is finished and the right one has just
been started. The seperate leading edges have been
glued on now instead of after the top & bottom
wing halves have been assembled as the instructions
would have you do it. These are not one of the better
fitting parts in the kit but glueing them on now
makes for a slightly better join.
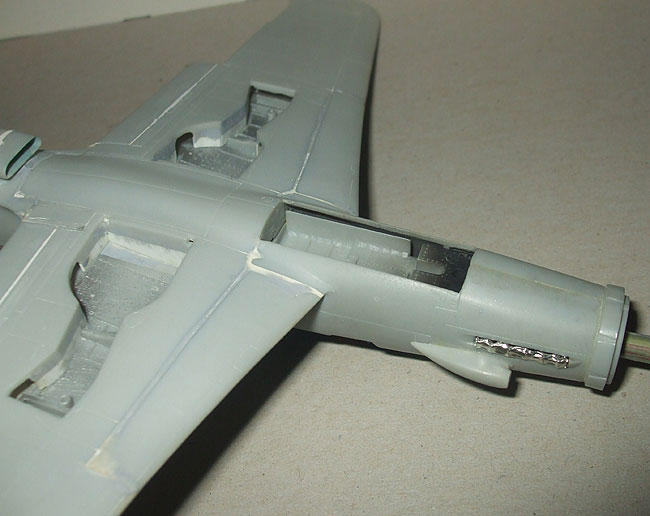
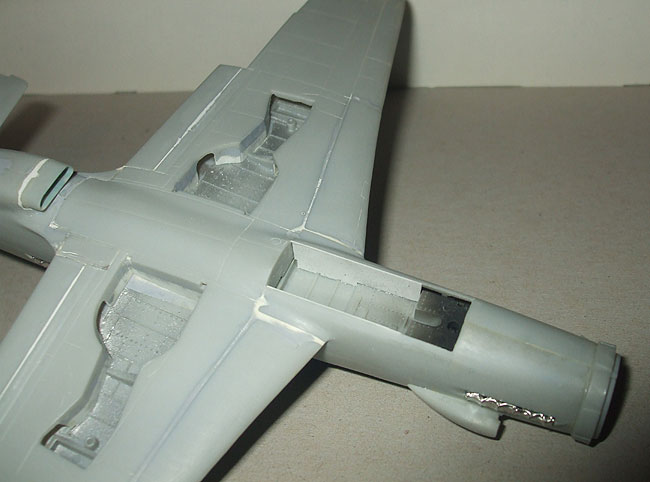
Below:
The next two pics show the finished main wheel wells,
the huge gap in the nose wheel well and the .005"
plastic sheet used to close this up.
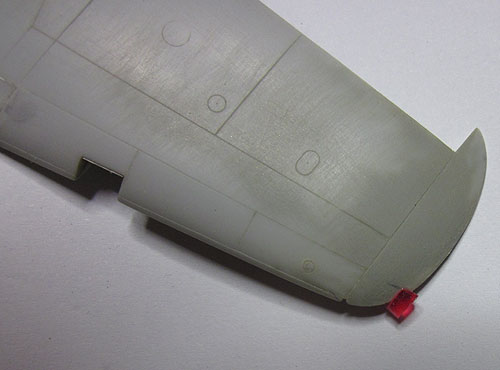
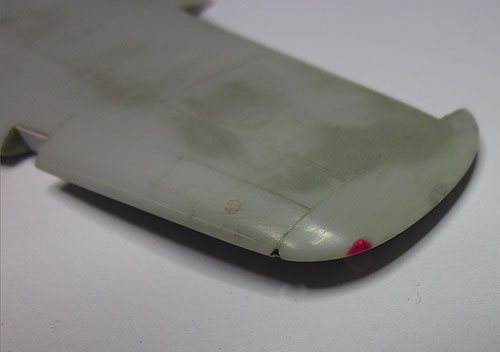
Left:
Navigation lights aren't represented at all in the
kit, not even by a scribed line. I used the good
old tried and tested method of tiny chunks cut from
pieces of clear red and green toothbrush handles.
The position of the lights was marked on the tips
then filed out. This was painted silver and the
blocks of plastic were super glued in place.
Right:
Once dry, the navigation lights were filed and sanded
to shape then made nice and shiny with polishing
cloths. I give the lights a thin overcoat of the
appropriate clear colour to darken them up a bit
as a final finishing touch. Obviously the nav lights
need to be masked off when painting the airframe,
but then, you knew that.
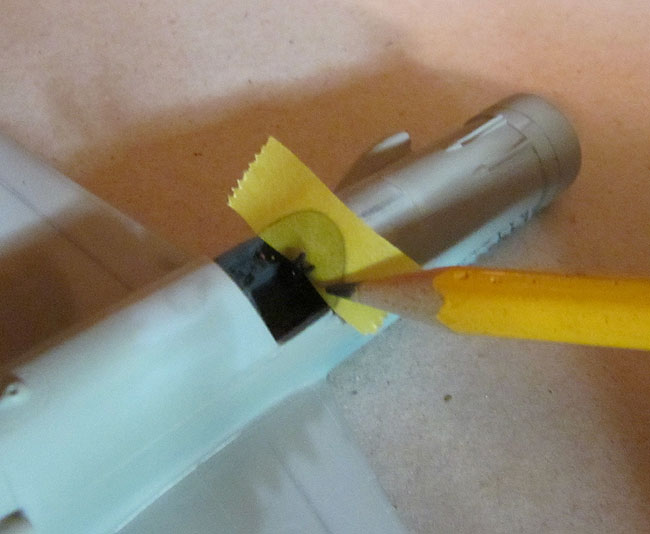
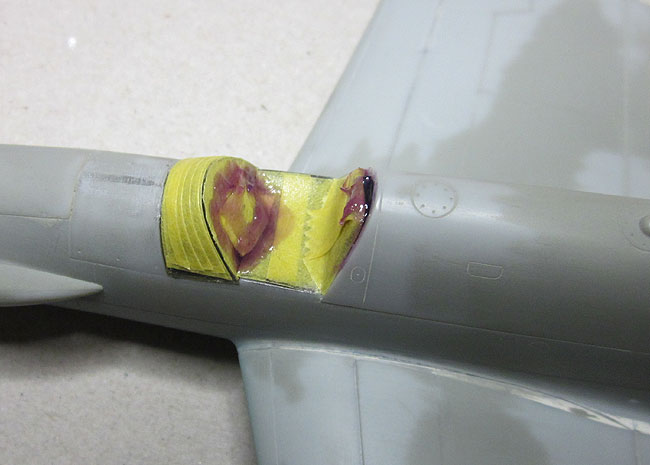
Above
and below: I find masking canopies challenging
at the best of times, but with the added complication
of a detailed cockpit with many easily broken sticky-out
bits in the way it can be even more, err... fun. Vacform
canopies in particular are tricky as the edges are thin
and don't give the tape much to adhere to. And they wonder
why I like WWI aircraft. My usual method as seen here
is to use the edge of a pencil to precisely mark out the
outline of the canopy/windscreen on a piece of tape. This
is then stuck to a piece of glass, cut out and re-applied
to the windscreen. The other areas are filled in with
thinner pieces of tape. Any gaps or lumpy bits that tape
doesn't like are masked with Humbrol Maskol. The horizontal
frames and the frames on the hinged portion of the canopy
were done with painted decal strips after painting was
complete.
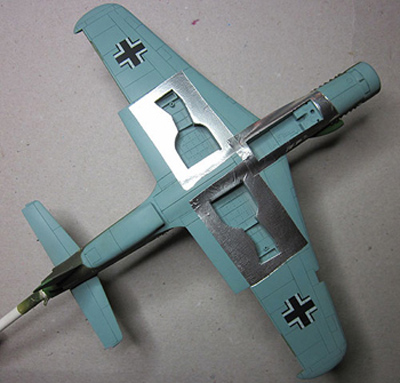
Wheel wells were
masked with Bare Metal Foil which I always find
the quickest and easiest way to mask odd shapes
like this. The restored Do 335 is bare metal in
the wheel wells and inside of the doors and I went
with this, figuring Dornier probably had more to
worry about late in the war than what colour their
wheel wells were painted.