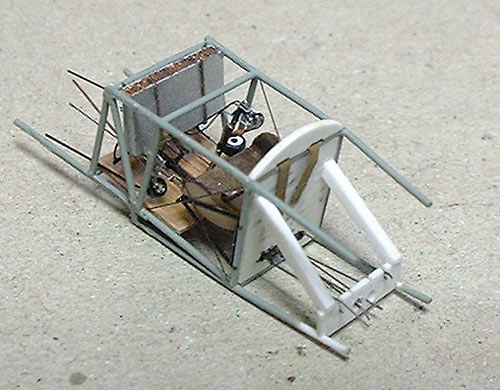
Having built two Dr. Is
and a D.VII, I've come up with a standard operating procedure
for their tubular framework cockpits that works for me.
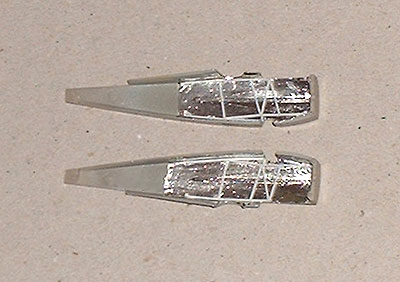
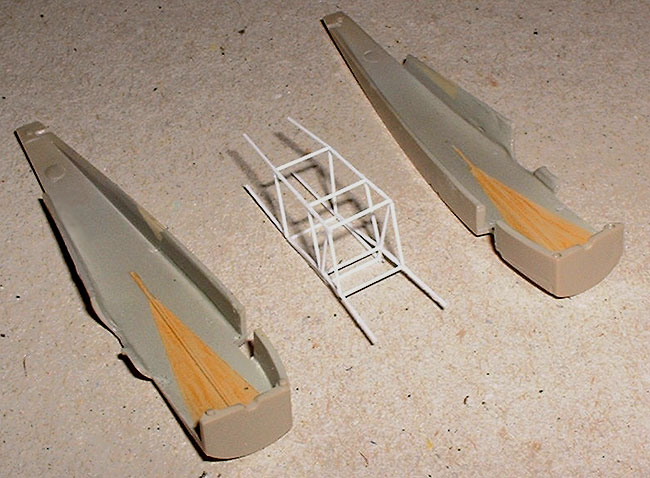
After thinning the inside of the fuselage as much as I
dare, I then line it with Bare Metal foil to act as a
barrier when glueing the framework together from .015"
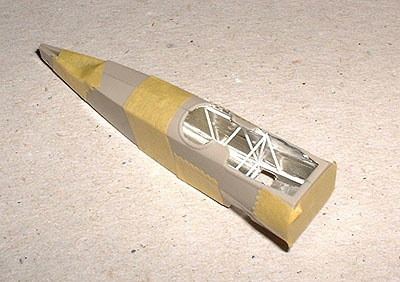
plastic rod. Once each side is complete, the fuselage
is taped together and the crossmembers inserted from the
opening on top. After the assembly dries, the tape is
removed et voilà, out pops the completed framework perfectly
sized to fit the fuselage. Detailing and painting can
then be easily done outside the confines of the fuselage.
Me likey.
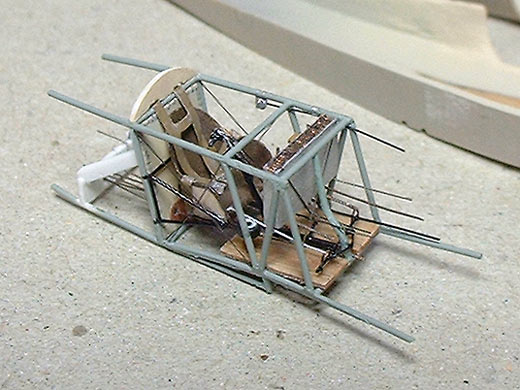
Seatbelts, seat, rudder
bar, throttle and a few other bits 'n' bobs are from Tom's
Modelworks, the rest is scratchbuilt.
Surprisingly, for such
a well known and distinctive aircraft, the options for
modelling Jacob's aircraft in 1/72 scale are slim to none.
Americal Gryphon did a limited run sheet for the IPMS
US Nats many years ago but finding a set is well nigh
impossible and the markings are apparently underscale
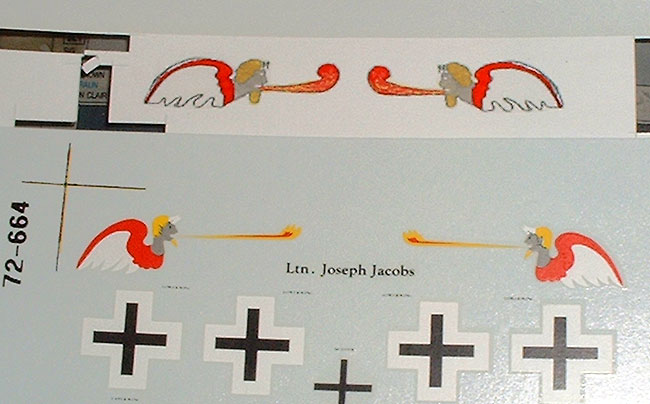
anyway, a not uncommon theme with AG decals. The only
current commercially available option is Superscale's
sheet 72-664. Sadly, they are - to be blunt - awful. The
devil (or Wind God, depending on which of Jacobs' accounts
you favour) bears no resemblance to the actual marking
and in fact wouldn't be out of place in a Hanna-Barbera
cartoon. What to do, what to do...
I waited.
Surely someone would eventually produce an accurate set
of decals in the many scale?? Copper State produced an
excellent sheet for the 1/28 Revell kit, Roden's are pretty
darn good in their 1/32 Dr. I and Dragon's look pretty
spiffy in their 1/48 kit. But alas, once again the poor
cousin got overlooked. I really wanted this aircraft in
my collection so I would have to take matters into my
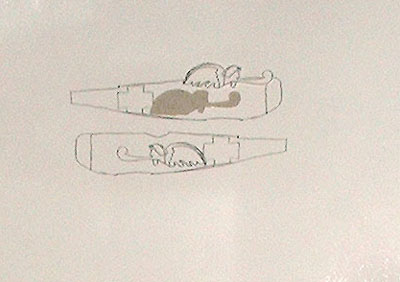
own hands. I traced the markings in the Albatros Datafile
Special, reduced them to 1/72 and then printed them out
on clear inkjet decal paper above
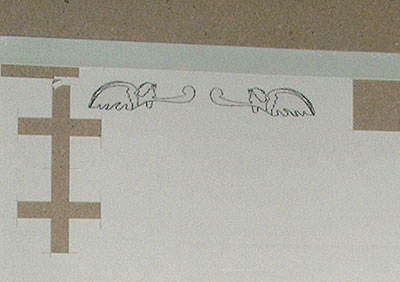
left. These were then cut out and
applied to white decal paper (I didn't have any white
inkjet paper at the time) above
right. The markings were handpainted
in the more commonly accepted colours (again, Jacobs'
accounts vary. He also stated that the wings were yellow
and white with the body and face in red and the hair in
grey. Take yer pick...). The result is, I think, somewhat
better than Superscale's happy red Swan:
Below
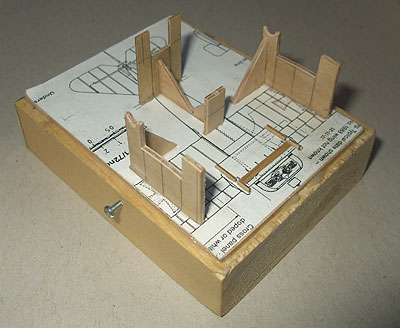
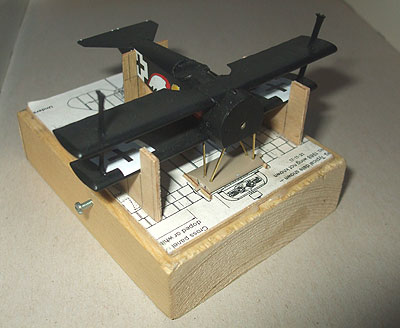
left and right: Since I plan to build
many more Dr. Is (I have more Fokker Dr. I decals and
kits than you can shake a Dreidecker at) I decided to
build a jig to make that pesky landing gear easier to
install. The kit gear legs are reasonable, but still somewhat
overscale so I replaced them with brass Strutz.
Jacobs re-engined his Triplanes
with Clerget engines. Legend has it that he offered a
case of champagne to any troops that could provide him
with captured examples. None of the larger scale kits
with his markings have this engine included so this would
have to be sourced elsewhere if building Jacobs' aircraft,
as is the case with any of the 1/72 scale kits. I have
several of the amazing resin engines from Small
Stuff Models that I've been hoarding for just such
an occasion and their Clerget was used here. They are
incredible castings; how they are pulled from the mould
without destroying the hair-thin pushrods or grain-of-sand-sized
spark plugs (two per cylinder!) I have no idea. They are
without a doubt the most nerve wracking thing I have ever
assembled (the use of a microscope would be a great advantage)
but the results are well worth it. I managed to irreparably
bend a couple of the pushrods but by careful placement
of the engine these were hidden behind the cowling. I
added spark plug leads from the finest copper wire I could
find, but only on the cylinders that were visible lest
I go mad during the process. The cowling needed to be
drastically thinned to get it to fit over the engine but
eventually it fit well enough for the engine to rotate
if I had wanted it to. For the reasons stated above, I
didn't.